Disclaimer: As an Amazon affiliate, I may earn a small percentage from qualifying purchases. This is at no extra cost to you. Learn more here.
Turning a pen is my favorite beginner project. It’s also one of my favorite go-to gift ideas to turn. Pens are usually turned out of wood or resin. This post focuses on wood. Turn a pen out of wood for yourself or as a unique gift for someone else. Every time I have given a hand-crafted pen, the recipient has been in awe. And a pen is something that will get used every day!
Previously we’ve shared steps for turning a pen on a lathe. That’s more of an overview. In this post, I share more about my own process, tools, and experience and how I turned this pen. I hope this project’s deep dive is helpful or at least interesting.
| Project: | Wood Pen |
| Skill level: | Beginner |
| Project time: | 1 hour or less |
Methodology & Approach
Conception & Design
I hadn’t made a pen in a while. When I sat down to write this post, I was inspired to turn one as a refresher. I like to keep wooden blanks and pen kits on hand so I already had all the parts.
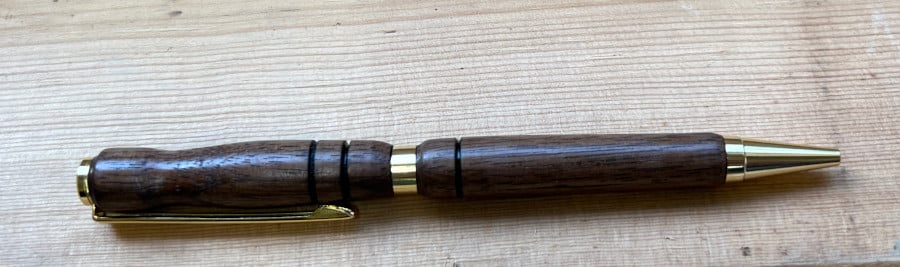
I usually make my pens with several beads and curves. This time I wanted to shoot for a sleek and smooth design. As with most projects, sometimes the design reveals itself as you go along. And, as you’ll see below, that’s what happened here. There are some soft beads, coves, and tapering. And I added some lines with wire burning.
I made this pen without a pen mill, barrel trimmer, or pen vice. This project took me a little longer than anticipated, from start to finish. For beginners, your first pen may take an hour or so. But once you get going, pens can come together much quicker. For some, a pen may only take a half hour or less. And experts may be able to turn multiple pens in as little as fifteen minutes.
Specifications
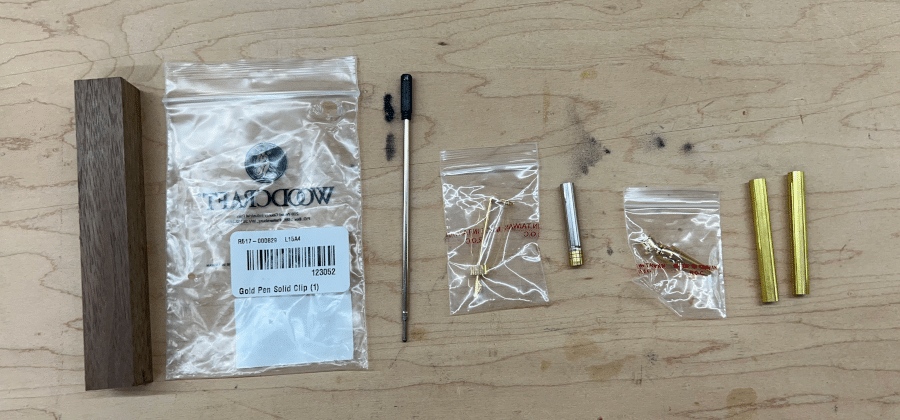
This pen was turned on my JET 1221VS wood lathe. I grabbed a walnut wood pen blank and a 7mm slimline pen kit I already had in my shop project supplies. Then, I pulled up the online guide for the pen kit and got to work.
There are so many types of pen kits. This is a slimline twist ballpoint pen with clip.
Materials to Turn a Pen
For beginners, here is some material terminology you’ll come across that I’ve got noted more in layman’s terms. Assuming you’ve got your lathe and a standard set of turning tools and accessories, here’s what else you will need:
- Pen Maker’s Bit – In other words, a drill bit that fits your pen kit. In my case, I needed my 7mm drill bit.
- Pen Blank – Check your kit’s instructions to make sure your pen blank is big enough. My kit called for two ¾” x ¾” x 2-¼” blanks. So I knew my 5” long walnut pen blank would work just fine.
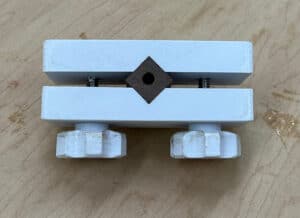
- Pen Vise – I use one I printed on my 3D printer.
- Drill Press – You could also use a hand drill but a drill press is easier to produce good results. And as you’ll find out below, even with a drill press, my project had some alignment challenges.
- Glue – I like using this super glue and accelerator kit. For beginners, though, I recommend a 5-minute epoxy to give you more working time as you get used to assembly.
- Barrel Trimmer – Or in my case, a bandsaw and a belt sander. It’s all about working with what you’ve got. (Update: I do have a barrel trimmer now).
- Pen Mandrel
- Pen Kit Bushings – I have a few sets of bushings. I needed a 0.332” set. Of course, the two sets I had in their labeled bags were the wrong size. And there was a set of unlabeled bushings. So I grabbed my digital caliper and sure enough, that’s the set I needed.
- Sandpaper
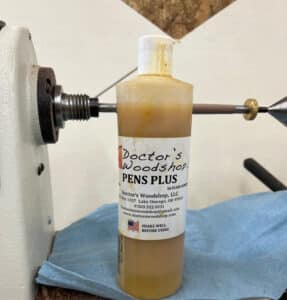
- Polish – Or any other finishing product of your choice. I like Doctor’s Woodshop Pens Plus.
- Pen Press – Or, again in my case, a soft piece of wood and a vice. Softwood and a rubber mallet should work, too.
- Safety Gear – Eye, ear and dust protection gear is recommended. I always grab at least a face shield when turning a pen.
How to Turn a Pen
While this overview assumes a basic understanding of turning a project on the lathe and lathe safety, it covers quite a bit at times. I did try to see this pen project through a beginner’s eyes and I wanted to share a candid turning experience.
Pre-Lathe Prep
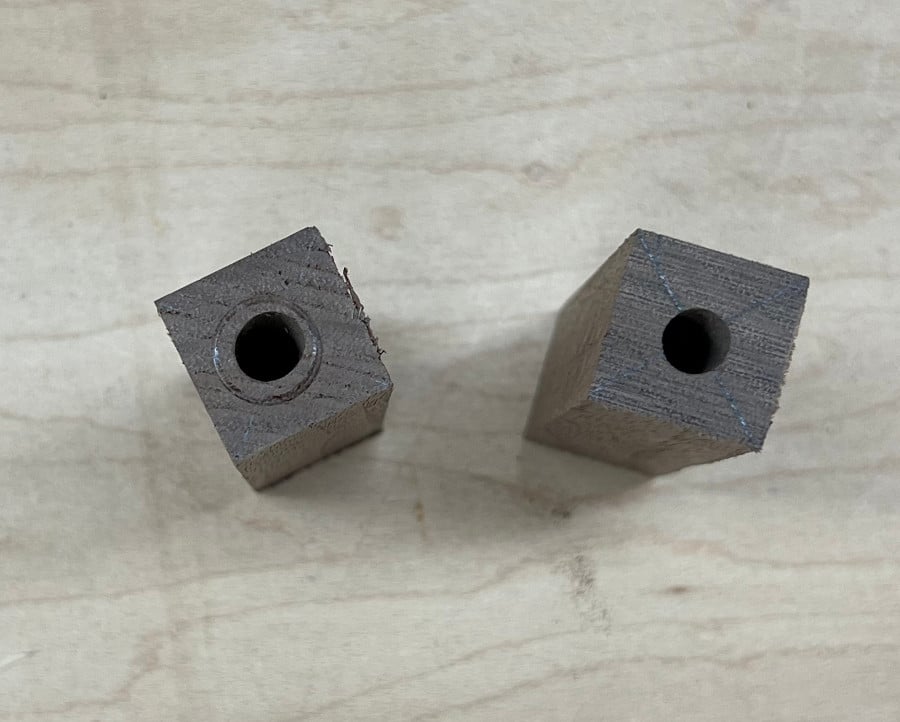
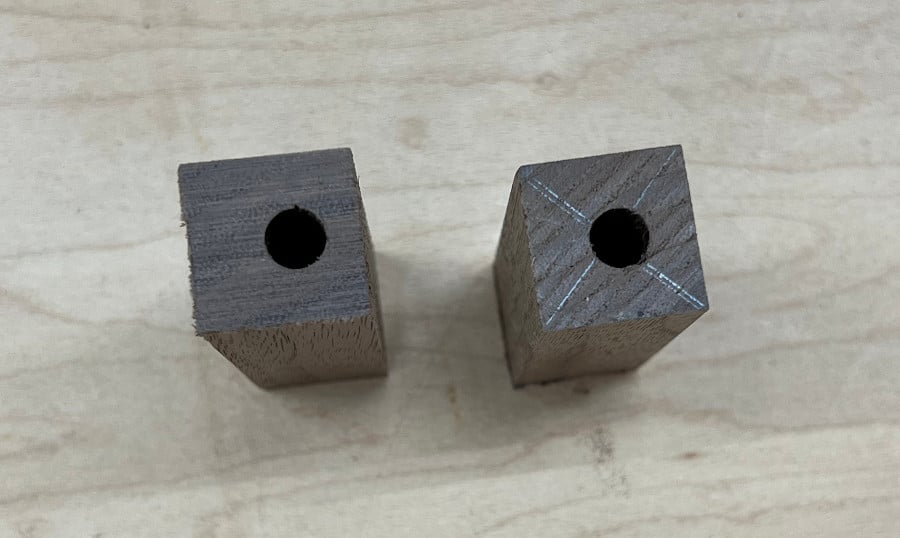
Find center & drill through
Most pen blanks are squared-off so marking the ends on the diagonal should work fine. Somehow between the blank, center marking, and drill press, my piece ended up off-center this time but it was recoverable.
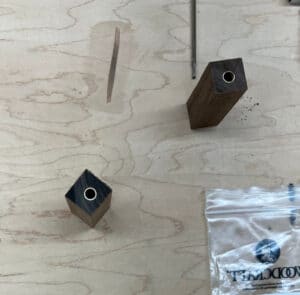
Measure, cut & mark pieces
My kit instructions called for 2-2¼” long blanks. I like a little extra on the ends so I cut my 5” blank in half to end up with 2-2½” long pieces. I also like to mark my pieces as soon as I cut them. That way I keep continuous grain wherever I can.
Scuff & dry fit barrels
Twist the tube inserts between some fine grit sandpaper. 180 grit is good. Scuffing the entire tube perpendicular to the length helps with glue adhesion. Dry fit the barrels in the drilled blanks. That way, if you have any fit issues you can address them before gluing. I think, as a result of the centering issue, one end of the blanks fit better than the other. I was glad to know this before getting the glue out.
Glue barrels
If using super glue or CA glue and accelerant, spray the accelerant into the center of the wood blank. Then run a line of glue down the barrel and twist as you insert the blank to spread the glue for good coverage and adhesion. If using epoxy, skip the accelerant step and do the same as the glue. Once the tube is inserted, tap the end on your work surface. This helps get the tube flush to the end. Repeat with the other barrel and blank.
Trim to barrel
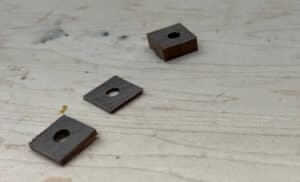
With the barrels flush at one end of each of the blanks, it’s time to trim the other end down to the barrel. This is also called squaring the ends or squaring to length. You can use a barrel trimmer. I use my belt sander. And this time I used my bandsaw and belt sander because there was quite a bit of excess. Just be careful to only remove up to the brass. Removing the brass could affect or even ruin the outcome of the pen.
Lathe Work
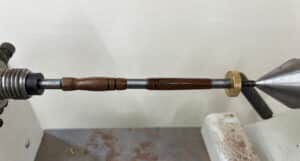
Load mandrel
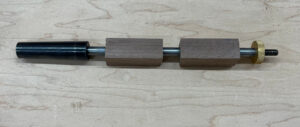
Start by placing a bushing on the mandrel. Then, you’ll load your first blank. Pay attention to how you marked your blanks and which one you want to be your cap or body. I usually load the cap first and in the direction I want it to run so the grain lines up with the body. Next, load another bushing, then your second blank. Again, pay attention to your markings and the direction you want the grain going in. Finally, add another bushing and secure with the locknut. All of the pieces should be snug against each other, and not loose, to turn safely.
Securely mount mandrel to lathe
Secure the mandrel between the head and tail stock of the lathe.
Rough into cylinder
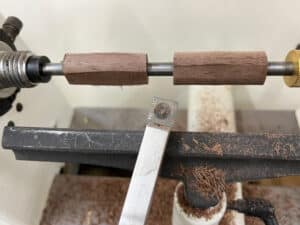
Once the piece is securely mounted, you are ready to start the lathe and rough the piece into a cylinder shape with a Roughing Gouge. I like to use my large square tungsten bit. This roughing took a little longer than usual because of the blank being off-center.
Shape
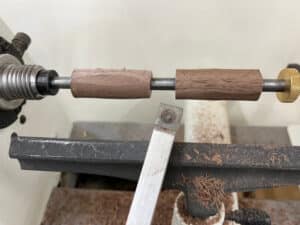
I free-handed this and just let the design show itself to me as I worked on the main goal of slimming it down. I used my square and round tungsten bits mostly. If you have a specific design vision or plan, you can of course stop the machine and mark off your piece with measurements and check diameters and lengths as you go along. I used my diamond tungsten bit to taper in the ends of each piece. The bushings are the same size as the center ring which is helpful to know. Also, watch the end of the cap where the clip will go. This should be slim enough to have the clip fit over and lay along it nicely.
Wire burning, optional
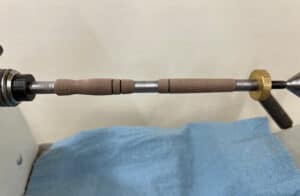
Since this was a slim design, I wanted to add a little interest to it. Once I had my shape, I used my diamond tungsten bit to mark where I wanted to wire burn. Then I grabbed my wire burning kit to finish the mark.
Sand
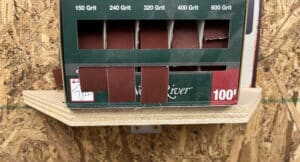
Work your way from 150 to 249 to 320. Carefully soften the ends, too, if needed. I use the coarser paper for final shaping and then work to smooth using the finer sandpapers.
Finishing & Assembly
Coat & Buff
I leave the piece on the lathe and with the speed way down I run a line of polish along the piece to cover it all over. Then I do one more pass to wipe off any excess before cranking the speed up to buff. I don’t have a fancy set-up so I’m usually gloving up and grabbing a shop towel I’ve torn into strips.
Then, as I run the line of polish along the top, a gloved hand with a scrap of shop towel is under the piece catching the polish and applying it all over. I take one more good pass with that scrap of shop towel and then swap it for a clean strip as I crank the speed up to buff. The towel does tear and needs replaced mid-buff but it’s manageable as long as you’re ready for it. Then I stop the lathe and start over again for about 3-4 rounds of polish and buffing, shaking up the polish before applying each time.
Remove & Dry Fit
Now you’re ready to turn the machine off and remove your piece. Remove the mandrel and then disassemble. Take care not to confuse your cap and body pieces and intended directions, if it’s not obvious which way they go. On a work surface lay out your kit and dry fit to see how the pieces should come together. Will the clip lay nicely along the cap? Do you like how and where the pieces meet the center ring? Does it look like the body end will taper into the tip nicely without any rough edges?
With this pen, I wanted to touch up and smooth the ends a bit more so I threw it back on the lathe and tapered with my diamond tungsten bit. Then I did a bit of light sanding and polishing again to touch up the finish.
Assemble
I don’t have a Pen Press so I use a piece of softwood and a clamp mainly to get the tip inserted snug and the twist mechanism and ink refill just right. Be sure the twist mechanism is in far enough but not too far. Twist and see how far the tip comes out. Adjust until it’s in the right position. I found a helpful notch on the twist mechanism, aligned to that and it was perfect. Add the center ring, slide on the body, and add the clip cap.
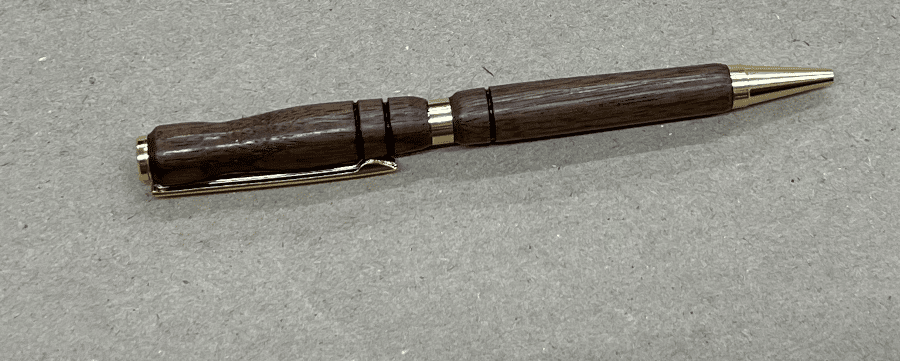
I really like how this pen turned out. It’s nice to hold and write with. I think I might keep this one for myself.
And I’m looking forward to working on a few other pen kits I have including a fountain pen. I also want to turn a resin pen again and a cigar ballpoint pen kit. If you liked this post, stay tuned for those project posts, too.