Disclaimer: As an Amazon affiliate, I may earn a small percentage from qualifying purchases. This is at no extra cost to you. Learn more here.
Last Updated on December 13, 2024 by Larry Edwards
If you have leftover scrap wood from previous woodworking or woodturning projects, why not turn those pieces into something beautiful and functional? In this project, we’ll show you how to use a simple glue-up technique to combine various pieces of scrap wood and turn them into a stunning tabletop wooden pedestal stand.
This pedestal stand could function in several ways. It could hold a cake. It could hold a large candle or a display of smaller candles. It could be the setting for a table centerpiece. Or read on to find out how I put mine to use.
Whether you’re an experienced woodturner or just getting started, this project is a great way to practice your turning skills while making something unique and practical. And it can make a great gift! Let’s dive into how to create a custom pedestal stand using your leftover wood.
| Project: | Wooden Pedestal Stand |
| Skill level: | Beginner |
| Project time: | 1 hour or less plus glue dry time |
Methodology & Approach
Conception & Design
My wife and I have two cats. We use an automated feeder for their dry food. After trying multiple configurations with the bowl that came with it and a 3-D printed splitter attachment, we weren’t happy with how the food was dispensing for them.
First, we tried the metal bowl it came with. The clang of the food landing on the metal startled our one cat. And it didn’t seem like something they’d be getting used to it any time soon. Plus only one cat could eat out of it at a time.
Next, we tried an attachment that would send the food into two separate, ceramic bowls. The food ended up everywhere. And the clang was still a little too much for the one cat’s sensitive ears.
Enter the idea of a wooden pedestal stand design. The pedestal would lift the feeding surface closer to the spout. The wood would help dampen the sound of the food dispensing. And the flatter, more open surface would allow the cats to feed from it together if they wanted. It would also reduce whisker fatigue, which I had only just learned from my wife is even a thing. I did add a lip around the top edge and a slight taper into the center to help catch and hold the food better.
Below, you’ll notice the finished product doesn’t quite look like the rest of the photos. That’s because the original design ended up being too tall for the cat feeder setup we wanted. So I ended up cutting the bottom off and reattached a different bottom. Sometimes that’s how projects go. And when it’s scrap wood, scrap poplar wood at that, it’s really not a big deal.
In my case, this pedestal was destined for a very specific use. And I share it to provide context. Whether you have cats, let alone a feeder in need of a new solution or not, there are so many elements of this project that I hope will inspire your next woodturning project (and motivate you to keep going when a project doesn’t quite go as planned). From gluing up scrap wood to making this design bigger or smaller, or with a flatter or more concave surface it can be made in so many different ways for so many different uses.
Specifications
Like the muddler, I free-formed this wooden pedestal stand design on my JET 1221VS wood lathe. I used some scrap poplar wood I already had. My selection came down to the size and shape I was going for. Also, I wouldn’t usually use poplar wood but it is a hardwood and what I had lying around. Since this project was a bit of an experiment, it was good to learn with this wood and not something nicer or more expensive.
The finished stand I made here is about 3-1/2” tall. The top and bottom are about 7-3/4” and 5-1/2” in diameter respectively. The smallest diameter is about 3”. Overall, this design is sturdy, serves its purpose and is easy to keep clean.
Materials
Provided that you have your lathe and a basic set of turning tools and accessories, here’s a list of additional items you’ll need:
Scrap wood pieces: Select one type or various types of scrap wood you have on hand. As long as the pieces are sturdy, dry and big enough for the section of the design they will be in, any piece should work.
Wood glue: Strong wood glue will bond the pieces together securely for turning.
Clamps: I used my Jorgensen parallel clamps to hold the glued-up pieces together while they dry. They are technically overkill for this purpose. If you’re looking for a good set of parallel clamps, the Jorgensen ones work fine, but when it comes to clamps I like Bessey best.
Calipers: I have a bunch of calipers around my shop. Especially for a free-form design, calipers are optional so if you don’t have one, don’t let that stop you from making this project. Although, I recommend getting some as soon as you can.
Sandpaper: This woodshop staple is for smoothing the surface after turning.
Wood Finish: Seal and protect the wood after the project is complete. I needed a food-safe finish so I used shellac.
New to woodturning and looking for a wood lathe in order to make this project? Check out our wood lathe review posts below:
How to turn a scrap wood glue-up pedestal stand
This overview of steps requires a basic understanding of lathe turning and fundamental lathe safety.
Select & prepare your scrap wood
Start by gathering and assessing your scrap wood pieces. You can use a variety of wood types and sizes to create a visually interesting and unique piece. Consider using offcuts from hardwoods like oak, maple, or walnut for a sturdy base. Don’t be afraid to mix and match the types of wood as this will give your pedestal a one-of-a-kind look. Consider size when selecting pieces. Larger pieces should be used for the top and bottom while smaller pieces can be used for the pedestal portion.
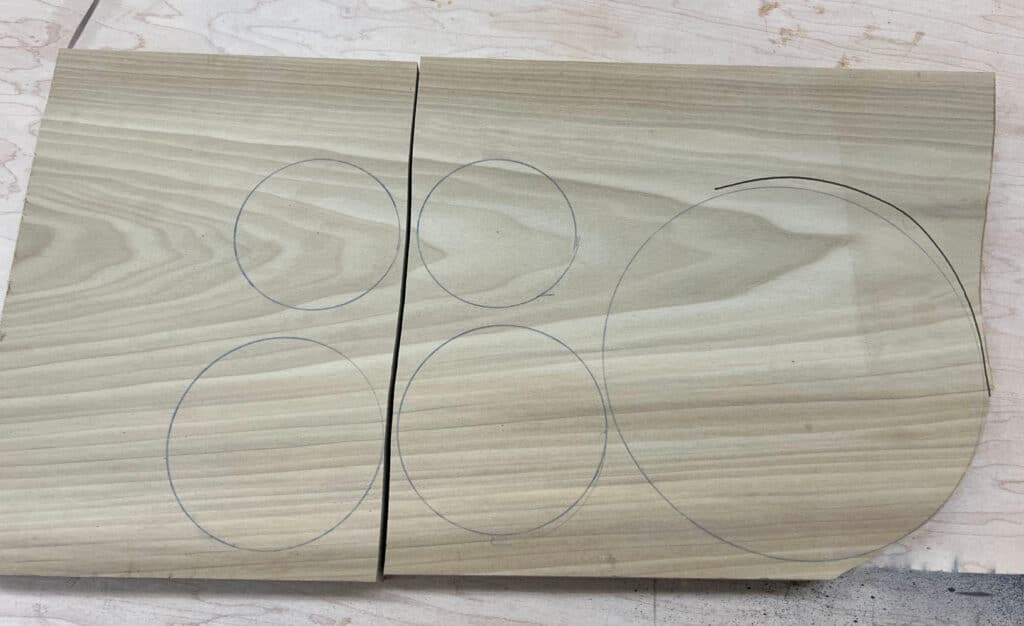
In my case, I used one type of wood and just took what I needed from it. Using my compass, I drew circles slightly larger than I wanted my finished project to be. Then, I used my bandsaw to cut them out. These are rough-cut circles. They don’t need to be precise. If you don’t have a bandsaw, you can use a jigsaw, scroll saw, or even a hand saw.
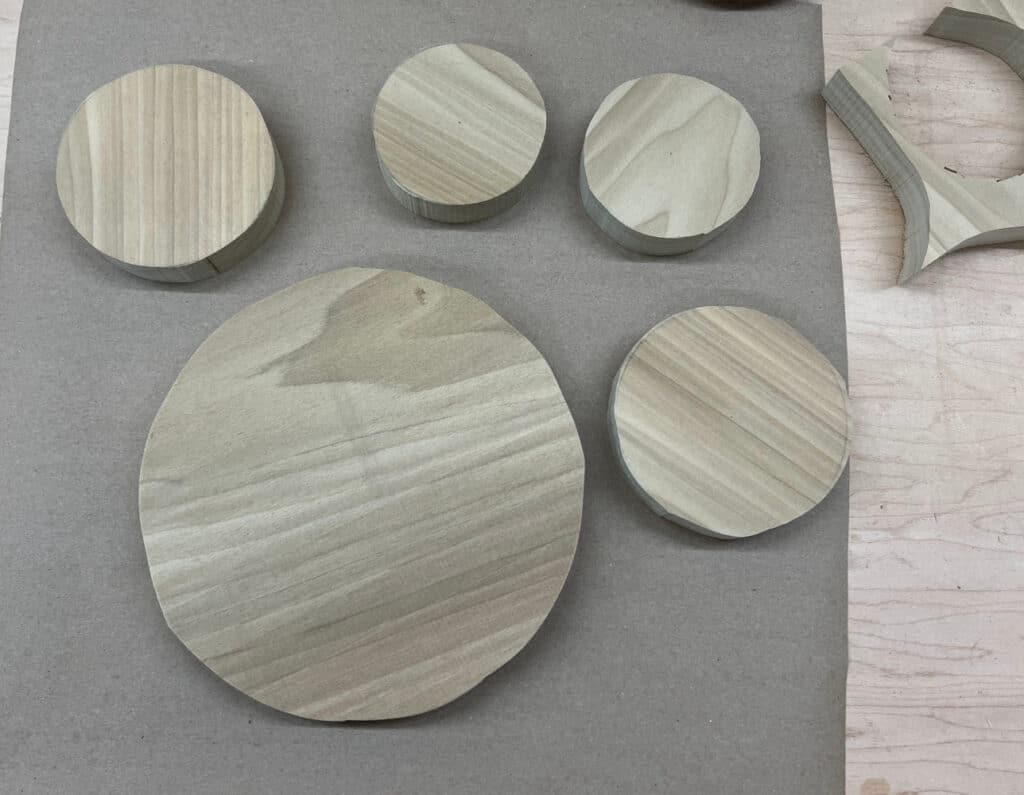
As for the surfaces, they were already flat and in good shape for gluing so I didn’t need to do any further prep there.
Glue up the scrap wood
Using strong wood glue, carefully apply a thin layer on each piece of wood. Stack them together with the centers lined up as best you can. Lining up the centers will be approximate. There’s no need to be exact. More on this in the steps below.
Press the pieces firmly and clamp them into place. Make sure the entire surface is evenly bonded and that the blocks are square. Clamp snugly but not crushing. You don’t want to squeeze all the glue out.
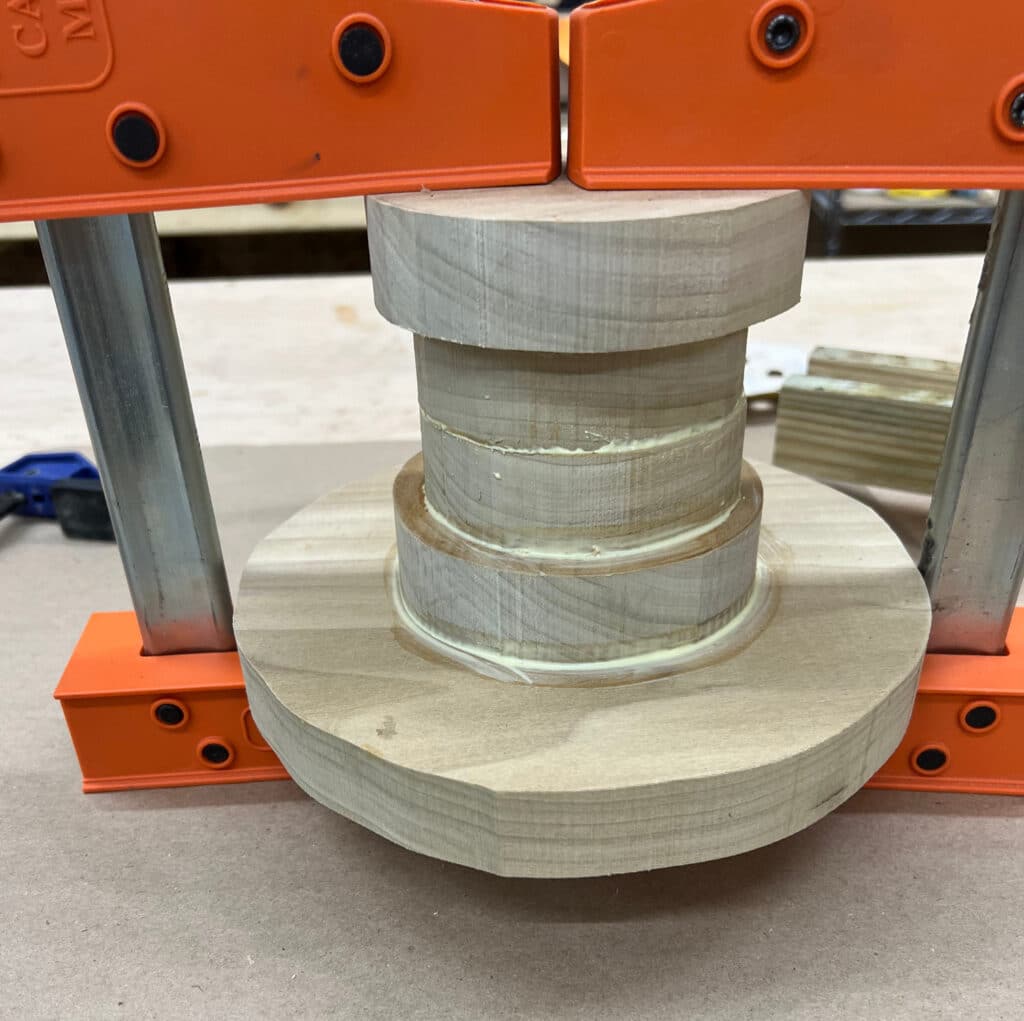
Allow the glue to set according to the manufacturer’s instructions at minimum. I want to be sure I have enough strength for turning, so I leave projects overnight when possible. For maximum strength, leave the glued-up block clamped for at least 24 hours.
Mount the block on the lathe
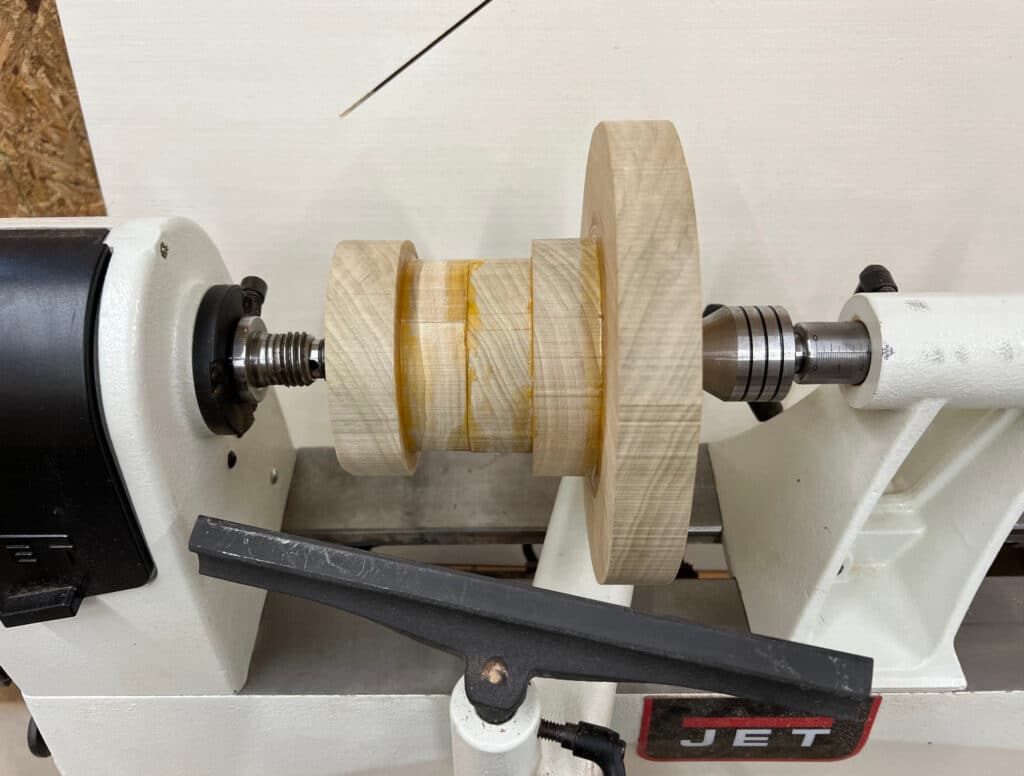
Once the glue has fully cured, it’s time to mount your glued-up block onto the lathe. Once securely mounted turn the lathe on at a slow speed to assess wobble. Now, some wobble is expected. As I said above, lining up the centers at the glue stage is approximate. To combat the wobble, watch your lathe speed as you work to get the piece centered with your roughing gouge or a large square tungsten bit. Keep the lathe speed lower until the piece is more even and there is no visible wobble.
Begin turning the wooden pedestal stand shape
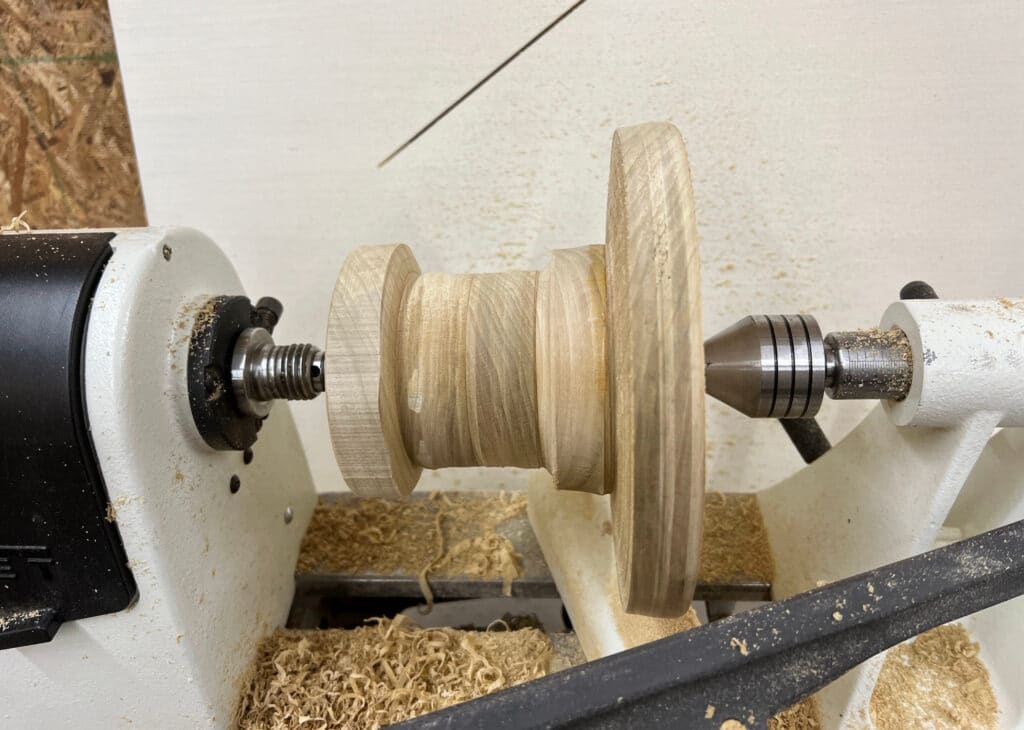
With the block securely mounted, you can start turning the pedestal shape. Begin by shaping the top into a flat surface. Then, use your turning tools to create the pedestal design. This could be as simple as a tapered base or more complex with decorative details like fluting, beads, or a rounded profile.
Focus on gradually refining the shape as you go, ensuring that the pedestal is even and smooth all around. If you want to add an artistic touch, you can use different turning tools to create texture or pattern on the surface of the pedestal.
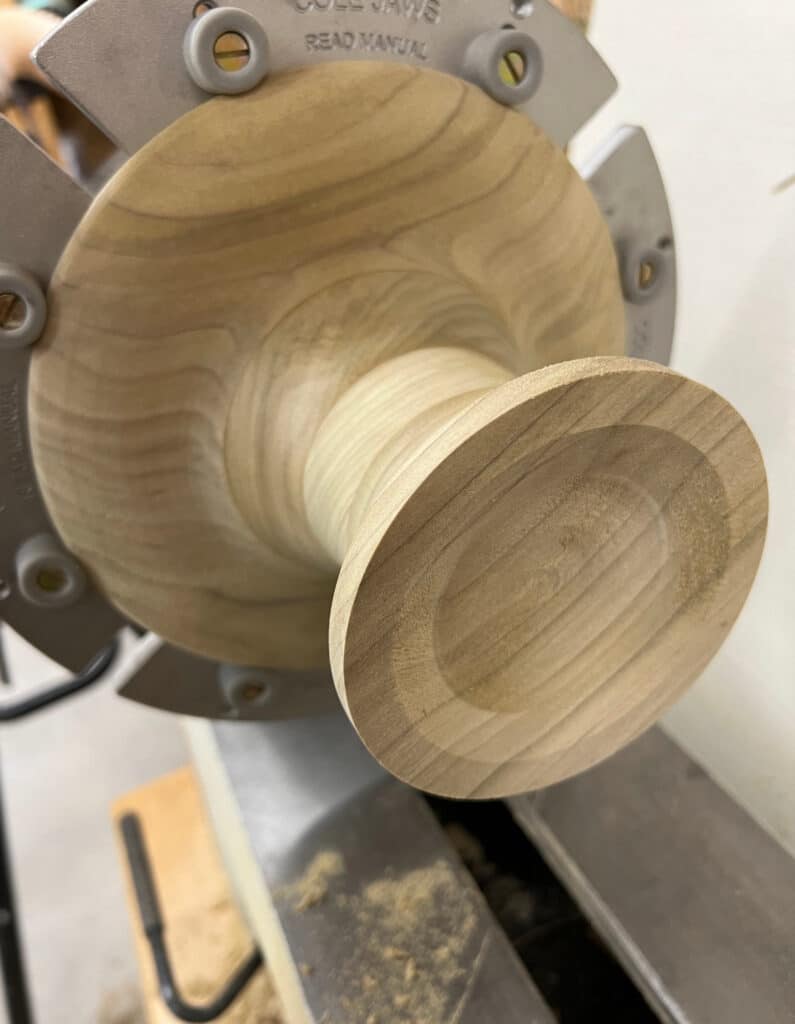
To really get at the top and bottom surfaces, I remounted the piece once the majority of the shaping was done. As you can see in the photo, I used a cole jaw.
Sand and Smooth the wooden pedestal stand
Once you’ve completed the turning, sand the pedestal smooth while it is still mounted to the lathe using progressively finer grits of sandpaper. Start with a coarser grit (around 80 grit) and work your way to finer grits (up to 220 grit or higher). This will ensure the wood is smooth and free from tool marks.
As I noted above, the photos on the lathe don’t quite match the finished project photo. It was before this step that I learned my pedestal was too high for its intended purpose. I was happy with the top part so I cut it where I needed it and repeated the process above – gluing on a new bottom, centering, shaping and then finally sanding.
Add Finish to the wooden pedestal stand
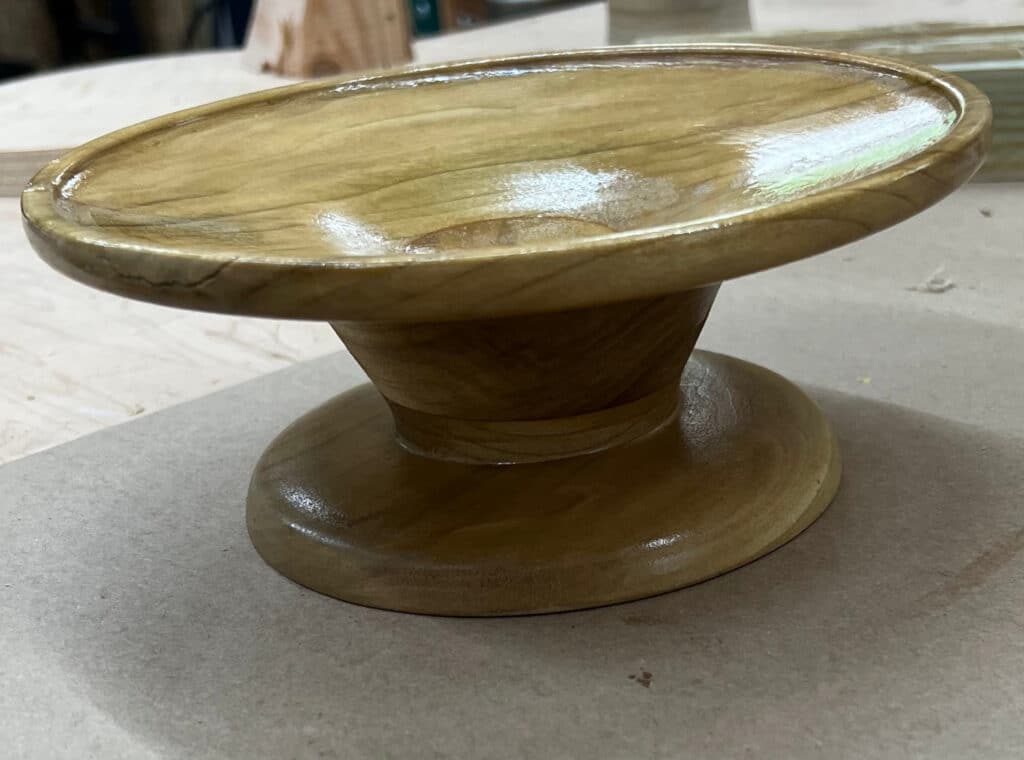
To finish the project, remove it from the lathe. Complete any final sanding touch-ups and apply a protective wood finish. I used shellac since it is food-safe because of my project’s purpose. You can use an oil-based finish, wax, or polyurethane, depending on your desired look and durability. This will help bring out the grain of the wood while providing a protective coating.
Be sure to apply the finish evenly, allowing time for each coat to dry before applying the next. A few coats will help enhance the wood’s appearance and protect it from wear over time.
Now, you have a custom-made pedestal created entirely from scrap wood! The unique look of different wood types and the beautiful turning work on the pedestal make this a one-of-a-kind piece that will stand out in any room.
Tips for Success:
- Mix Wood Types: Don’t be afraid to mix different types of wood for an interesting, multi-tonal effect.
- Take Your Time Turning: Pay attention to the details when shaping the pedestal. Taking your time will lead to a more polished, professional look.
- Stabilize Your Wood: If your scrap wood pieces are uneven or have a lot of grain variation, be sure to secure them firmly before turning to prevent any instability on the lathe. Especially with the anticipated wobble noted above, firmly securing wood is important.
- Glue alternatives: If you want to turn sooner than next-day as suggested, you can use CA glue in addition to the wood glue. A few dots of CA glue in key places then spread wood glue around those anchor points. Clamp and you could be turning in a couple of hours if needed.
Conclusion
This glue-up woodturning project is a great way to repurpose scrap wood into a beautiful, functional piece to use or display. By combining basic woodworking skills like gluing up wood, turning on a lathe, and applying a finish, you can create a custom tabletop pedestal that’s as unique as your style. Plus, it’s an excellent way to practice and perfect your woodturning skills.
So, gather up your scrap wood, fire up the lathe, and get started on your own custom wooden pedestal stand today!
Looking for more projects like this? Check out our Project Ideas section. And be sure to subscribe to our newsletter to never miss a new project post.
